Tuesday, June 16, 2009

Castle Fight Strategies: guide to Massive AOE

I guarantee that this tactic has the greatest AOE attack power at this time in CF, which means there is no way to face this kind of unit formation in front.

The race you'll need is:

Corrupt
Chaos
Elf (union)
Northern

======================

Stage 1:

Corrupt builds Neither Ancient
Chaos builds Chaos Citadel
Elf builds Dragon hawk Portal
Northern builds Azure Nest
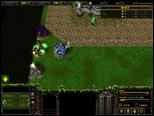
Image

Note:

In the end when Elf builds Dragon hawk Portal, Chaos will have enough money to upgrade Chaos Citadel to Greater Chaos Citadel.

What can you expect?

Basically you will notice this formation has 3 air units formation and only 1 ground unit, so opponent's who haven't prepared with sufficient anti-air will suffer.

Because elf has rushed to Dragon Hawk, this tactic also sufficiently counters enemy air.

There is another advantage I noticed recently, Chaos Champion's attack type is normal, and it is good to kill Troll, Blood thirster, Suumpnolk and Marksman (This one is weird. Effects seem good even though Sniper is light armor), so if your opponents don't build a good meat shield in front of their anti air units, you can massacre their units with Chaos Champion.

What if this doesn't work?

Option 1:
Corrupt buys a blast staff and passes it to Northern.

Option 2:
After Corrupt gets its first Shadow Drake, re-synchronize all units, wait for them to spawn, and then stike with Northern.

How does one re-synchronize all units?

1. reset Shadow Drake
2. 2 seconds later reset Chaos Champion
3. 2 seconds later reset Dragon hawk
4. 2 seconds later reset Azure Drake

The math that justifies the above is as follows:

Shadow Drake 400 => 15 + 400/20 = 35 (seconds)
Chaos Champion 350 => 15 + 350/20 = 32.5
Dragon hawk 310 => 15 + 310/20 = 30.5
Azure Drake 280 => 15+ 280/20 = 29

So it shows you just need to count down approximately 2 seconds for each units then you'll get your re-synchronization.

Re-synchronization is extremely useful before any sides use their strike. When you re-synchronize before you strike you get an overpowered push wave after you strike, and if you are lucky enough to have guessed the right timing on your re-synchronization before they use a strike, they'll find they wasted a strike and will have to use another one.

Being good at micro-management is really important in stages 1-2 because it allows you to re-synchronize well.
By stages 2-3, re-synchronization becomes less effective because there are too many units on the field.

What you can do sync trick?

Indeed, synchronizing is a part of the core strategy that everyone should know. Here I listed what units are good for doing sync.

350$:
Chaos Champion
(But this one seems only 1 from start to end game)
Red Dragon
Ballista

400$:
Shadow Drake
Ice Queen

These five units are core AOE damage output units, so you must sync them for best the battle result. (Uless you are facing frost luncher.)

======================

Stage 2:

Corrupt builds Shadow Ancient until there are totally 3 (so it means 2 more after the first one). And lastly, one more unit in this stage (I prefer Felhound for this one). This aims for 1350 wood.

Chaos

Now I have better route to build creeps.
Satyr x3 to form cage on the corner(don't upgrade), Red Dragon x2 and one last unit depending on how much you need for a SoD. If you are receiving very little pressure then try an Infernal, otherwise get a Red Dragon.

This one is better because you will already be prepared for opponent's specials, and at the same time I found that waiting for red dragon is just too long to wait. Waiting for a red dragon will slow down your income rate.

Elf builds Blood elf War Academy, if opponents have more land units, especially mass casters, build High elf Siege Factory x2, then more Dragon hawk Portal (don't build School of Wizardry unless there is a eraser).This aims for 1800 woods

Northern builds Crystal Palace x2, one last unit that depends on the situation. It's usually safe to get even a third Crystal Palace. This aims for 1350 woods

Note:

In the stage 2 opponents WILL be abusing specials, The key to survival is farming to weaken their usage of specials and still be able to aim for enough wood.

Here is a good guide:
farming guide by monk
Image

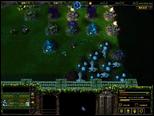
Good farming ration usually goes about 1:3. It means like opponents built a Obelisk of light, and we need corrupted ent 125x1, 2 satyr 120 x2 to form a cage. It will most likely not be frost wolf. I'll wait for queen, This is just an illustration to show you what a cage looks like.

and what unit is still good to do farming in 1.12?

Any cheap units you can find !!

For example,Corrupt has Corrupted Ancient of Battle (125$), Chaos has lesser Demon Cage (120$), Northern has Snowy Rocks (115$).

Caging them will result in weak units surviving longer on the battle field. And don't forget the building cost is the production rate: 15+ building costs/20, the lower the cost, the faster the production rate, therefore, this is an easy calculation between their special and how many weak units we need. The ratio is about 1 : 3, this means when they have 1 Obelisk of Light, Well of Pain, City of Magic, Death Pit,...etc. In this situation, sufficient farming will be 3 cheap caged units versus 1 special.

The two things you'll need to find a different way to deal with are Volcanoes and Forgotten Ones.

(Well, maybe Starfall Obelisk should be included as well, but since it is nerfed, I think most people will choose Amazon.)

When you face Volcanoes it's hard to sustain your cage, but fortunately most of your units are AIR units, so it won't be a good counter to your formation. Just stop producing those cheap units. BTW, if opponents try to mix Volcano with other specials, just try TOP LANE. Building cheap units without a cage on the top lane is the answer. It will waste and drain their power.

When you face Forgotten Ones it is also hard to sustain your cage, but fortunately Icy Tower from Northern is a good counter to mass Forgotten Ones (Corrupt Protector is also a good counter, but northern has less wood requirements). Building only 1 Icy Tower near your cage will make you free money. (Try RP that versus 5 AI one)

When you face Forgotten One it is also hard to sustain your cage, but fortunately Icy Tower from is a good counter to mass Forgotten One, build only 1 Icy Tower near your cage will make you free money. (Try RP that versus 5 AI one)

======================

Stage 3:

Corrupt builds Eye of Corruption

Then build 1 void keeper. After that it depends. I usually save for items. However, the alternative option is to build more Shadow Dragons and Wells of Pain. This is still a good option.

*Forgotten One in the end game stage doesn't seem good when there is a lots of AOE damage on the field.

Chaos builds Shine of Destruction

If you're finding that your opponent is overwhelming you with more meat shields then balance the situation with more Infernals. Otherwise, try more Red Dragons. And don't forget Magic Tower Ruin or Volcano!

Elf builds Shrine of Justice

The only good unit for Elf in the end game is still Dragon Hawk. I find, for the most part, that you can abuse this, but if you're finding that your opponent's long siege units are beating your Ice Queens, you should try more ballistas. And don't forget Obelisk of Light.

*City of Magic in any game stage is totally a waste of money, so don't build it!

Northern builds World Freezer

Afterward Build 1 Wandigoo. I usually prefer Ice Queens for the rest of the units. But If you're finding that the power of your air isn't sufficient, for instance if your opponents built too many Dragon Hawks and are forcing a tie with your air, then try to mass Azure Drakes. It will be the deciding factor. And don't forget Greater Frost Launcher.

Note:

Stage 3 is almost 15 minutes into the game. After this stage it's totally chaos. What you need to do is mass those AOE units similar to what you did in stages 1 and 2. The difference is you'll buy an orb, drum and bass, mass specials, change single lane tactic to both lane, etc. There's too much to be explained, but after the end of stage 3 there is nothing that can stop this formation because there is too much AOE damage in the front.

What forms AOE attack?

There are 4 main resources:

Spell Damages from Queen and Dragon hawk.
Splash Damages from AIR unit.
Long Range Siege.
World Freezer.

Maybe nobody noticed that this game was designed with higher armor values for high-end units. And what does armors value mean? It means your units are stronger than the HP values you see on your screen would suggest.

Unit takes damage = damage / (1+ Armor*6%)

SO

Unit maximum HP = Unit equal HP / (1+ Armor*6%)

Unit equal HP = Unit maximum HP * (1+ Armor*6%) (when armor > 0)

At the first glance, everyone will think to nerf a unit by reducing it's armor or picking a good damage type. In fact this is WRONG! There are other ways to totally ignore armor. :twisted:

They are spell, splash, and cleaving damage (I don't know how the line damage from ballistas will act). Reducing armor to make huge damage is totally a waste of time!

So, I combine these 3 kinds of effects to form the maximum AOE attack. Your unit number will increase with time, and most of the units without enough HP or magic resistance will be instantly killed in the later game stages. For now even several infernals still get killed in a second (1500 HP! and 7 armor = 42% equals HP = 630 is ignored!) , I think only legendary Hydra will be stronger than infernal, but it is not possible to use a meat shield protecting units behind it since there are AOE effects everywhere and 0 armor effects on them.

Focus on Damage

However, I didn't feel satisfied with only massive AOE. I also abused reduced armor effects and increasing both attack speed and damage at the same time.

reduce armor effects from:

Single target from Blood thirster
650 range Aura from Void Keeper
850 range AOE from Wandigoo
Whole map from Eye of Corruption

Increasing attack speed:
Felhound

Increasing attack damage:
525 range AOE from Chaos Champion

It is already overkill without AOE attack. 8)

Strength and Weakness

Strength

This tactic has overkill power on units pushing, once it completed Nothing is capable to withstand this tactic.

This tactic also has better income growing rates since it doesn't use any specials before legendary buildings. Dealing with opponent's specials by farming will also make sure you have more units than they do.

Weakness

Lack of Healing power and too unit focused. This is not a good rush tactic.

AOE attacks grow with Time, and therefore it is not very strong at first. Focusing on units means that this tactic doesn't murder units with killer specials. Players must know HOW TO PLAY WITHOUT SPECIALS until the 1st legendary building for each race is built. This will be hard for newbies because farming and single lane strategies aren't popular in public games.

Tactics over tactics, this isn't ready for newbies. 8)

Saturday, June 13, 2009

Castle Fight Strategies: guide to farming

Table of Contents
1. Introduction
2. History
3. Rational
4. In practice: how to farm
5. Farming counters what?
6. Specific ways to farm versus specific special buildings
7. Farming units other than murlocs
8. Ramifications
9. Conclusion


1. Introduction
“Farming,” the official term coined by the Koreans, refers to the strategy of trapping units in a box in your own base, so they remain stationary and do not engage in combat. Other terms it may be referred to include boxing and caging.

2. History
A few months ago, the strategy of mass special buildings seemed unstoppable. No matter how hard you tried, no ordinary strategy could be used to combat the combination of obelisks, wells of pain, magic tower ruins, and/or death pits. No matter what kinds of units you made, just a few of these special killer buildings would decimate all the units on the field. Many forumers who have not played against competent people who use this strategy will disagree, but I can assure you this is true. No responses to this post should be about mass specials vs mass unit producing buildings, as this guide is about farming.
The problem with this metagame was that it led people to turn off unit production to avoid feeding your opponent bounty. Then a long war of mass treasure boxes could ensue, until one courageous team would sync and release all their units. The combination of mass wizards and silver glades, at the time, seemed to be the only option that could overcome mass specials, until the farming strategy was discovered and employed.
The farming technique was developed long ago by Koreans to counter special buildings in any amount. As one of the first non-Koreans to play castle fight on the Asia server, farming seemed awkward to me at first as well. The Koreans would still always lose to us, because of their unfamiliarity of mass special strategies and our better timing. However, after they started adapting, we started to lose a few rounds. After examining and analyzing the replays, we began to suspect there was great validity in the farming strategy.

3. Rational
If you have never played the farming strategy, at first it may seem silly. Many people who simply hear about it do not the grasp the concept of why it works. I will try my best to explain the reasoning behind it. All killing special buildings work in a similar way:
1. Randomly select a unit out of all of your opponent’s units.
2. Apply a single targeted effect to that unit.
or
2. Apply an aoe effect centered around that unit.
Keep this in mind as I go on.

Normally on the battlefield, there are x units belonging to your team. Let’s say your opponent builds a death pit. Then, every 12 seconds, a unit on your team will die. To counter this, many people simply spam weak units. This is an effective counter, because you’re adding the number of units on your team, reducing the chance that your important big units are hit with the death pit. However, there are a few problems with this strategy. The cheapest spamable units are never good for actual fighting and they usually feed your opponent bounty instead of contributing to the battle. Once your opponent starts getting the good aoe damage units that are the best units for winning late game, these weak units will serve little to no use in actual combat. In addition, once these units die to either your opponent’s units/buildings or a rescue strike, the number of units you have on the battlefield goes down drastically and special buildings instantly become more powerful. To reiterate, the three problems are:
1. Spam units don’t add much to combat
2. Spam units feed your opponent bounty
3. Spam units lose some effectiveness once your opponent strikes them.
To alleviate these three problems, we come to the solution of farming.
When we farm units, we have them boxed in, unable to move or fight at all. In this way, they will take absolutely no damage from conventional units. There is no possible cost effective way to get rid of these units. The units will slowly build up, giving you a pretty much permanent source of spam, shielding you from unit killing buildings or unit damage buildings.
The one big disadvantage of farming is that the obelisk of the wild, the orc totem, and the silver glade become less effective, especially the first two. A buff to any of your farm units is practically useless, and with a big farm, these buff specials will almost exclusively buff units in the farm.

4. In practice: how to farm
What is the best race to farm with? The clear solution is the naga race. Murlocs are by far the best unit to farm with. One obvious reason they are good is that they spawn 2 units every few seconds at a very fast rate. They have, by far, the best cost per unit in the game. One murloc has 170hp, allowing it to barely survive one hit from the obelisk of light. The murlocs can also be upgraded for more hp, in case you have specials that do more than 170 damage at a time, ie tidal wave or well of pain. An overlooked advantage of murlocs is their small collision size. You can easily fit many many murlocs into a single 2x2 space, while you can only fit 4 grunts into that same space. In addition to murlocs, naga has the coral statue, which allows for cheap easy healing, healing damage from the obelisk of light, well of pain, and especially aoe damage like volcanoes.
I will talk about how to farm on the west side of the map. The east side is exactly the same, except everything is reversed. The best places to start your farm is at a corner, because you will only need 2 buildings to block off an area. The four best places for the west side are the top left and bottom left corners of the map and the top and bottom parts of the map directly to the left of the walls.
One misconception behind farming is that it is wildly expensive. This is completely false, as it only costs a mere 120 gold to farm and I sometimes find that a 120 gold farm is all I need. Simply have your ally build any random building for you in the appropriate place, and then build your murloc hut to close off the box. There is a specific way to do this. For example, the correct way to farm on the bottom left corner is:

Correct Way
_____
|____|<-murloc hut |____|_____ ||||||||____| <-ally building ||||||||____| ^farm area In this way, you rally the murloc hut to spawn units all the way to the bottom left of the map. If your ally building is a unit producing building instead of a special, rally it to the top right, so units that spawn from that building will not get trapped. Wrong Way _____ |____|<-ally building |____|_____ ||||||||____| <-murloc hut ||||||||____| ^farm area You cannot switch the ally building with the murloc hut, as shown in the wrong way diagram. As murlocs spawn, they will bunch up to the right, because they want to travel to the right towards the eastern castle. If the area directly to the left of the murloc hut is completely occupied, new spawning murlocs will not be able to be spawned inside the box. This is the standard one box farm. You can make your starting farm bigger if you have more buildings to farm with. As the game goes on, you can make significant changes to your farm. You may also add onto a one box farm with more buildings as the game goes on. When your opponent gets a well of pain, you may upgrade your murlocs to level 2, and when your opponent gets volcanoes, you should get a coral statue to counter. Other Hints: 1. There is a coral statue bug where you do not need the coral statue to finish for it to heal life. Say, for example, you are saving to a naga siren. You can build an unfinished coral statue next to your farm, or anywhere else for it to heal your units during the time you have between 250 and 350 gold. Keep in mind, you only get the full gold refund back if you building does not get damaged. 2. As the game starts, I do not recommend farming or even placing buildings to get ready to build a farm. If you build too low and the main battle is near your castle, your ground units will run past this battle, probably causing you to lose your push. Flying units are even worse, directly flying past any battle in the lane going straight for the enemy base. 3. One point I want to stress is not to uselessly waste gold on huge amounts of murloc buildings, especially if your opponent stops building specials because of your farm (which most good people do). You will still need good units to push your lane, as farming is not an offense, it’s a simple defense verses their offense. 5. Farming counters what?
Farming totally counters:
Obelisk of light, City of magic, Well of pain, Magic tower ruin, Volcano, Oracle, Death pit, Chilling mushroom
Farming somewhat counters:
Tentacles(late game), Ancient Pyramid, Serpent ward, Starfall obelisk, Assassins
Farming affects in some way(positively or negatively):
Eraser, Skull Pile, City of Decay, Tidal wave, Frost launcher, Artillery
Farming does not affect in a noticeable way:
Eye of destruction, Shrine of Destruction, World Freezer, Stun ward


6. Specific ways to farm vs specific special buildings
1. Obelisk of light
Murlocs are perfect farm units vs obelisk of the light. In 1.11 obelisks do 165 damage instead of 175 in 1.10. Since murlocs have 170 hp, this allows them to barely survive one hit.

2. City of magic
Getting your farmed murlocs turned into sheep is not a very big deal.

3. Well of pain
Upgrade level one murlocs to level 2 murlocs, as level one murlocs can die to one cast from the well of pain. Farming is extremely effective versus wells of pain, because they cannot save mana on their wells when they are pushing and release the mana once you strike, killing all of your first units. Instead, there will always be a buffer of units protecting your main pushing units.

4. Forgotten Ones(tentacles)
Forgotten ones can give early murloc farms trouble. However, when the farms fill up, then tentacles will actually spawn outside the farm, and will only damage your buildings. Later on, mass sycned tentacles can mess you up, but you can trap in royal guard if you’d like, which almost instantly kill tentacles.

5. Eye of destruction
The eye is a global effect and is not countered by farming.

6. Magic Tower Ruin
The only effect you may have to worry about is the mutation effect, but a few murlocs do pretty well versus a mutation.

7. Volcano
The beauty of the farm is that volcanoes become completely useless once you have enough murlocs and a coral statue. In addition, volcanoes don’t stack with each other in the same area, so massing volcanoes will not work.

8. Eraser
You opponent won’t get an eraser until late game, at which point, your murlocs will probably get erased. This isn’t as bad as it sounds, because your mass expensive units will be safe from destruction.

9. Shrine of Destruction
It’s not a big deal if you let some units out because a blocking building was destroyed; just rebuild. Also, you really want your murloc producing buildings to be destroyed, as they’re one of the cheapest buildings in the game.

10. Starfall Obelisk
This building can actually do some damage. However, with enough coral statues, you will survive the stars falling down on you, as the 400 damage is not in a single instant, but rather over 8 seconds. As with volcanoes, starfall does not stack in an area.

11. Oracle
You want your opponent to steal murlocs; it’s a free one gold for you.

12. Ancient Pyramid
An aoe stomp is no big deal for these murlocs.

13. Tidal Wave
You must upgrade your murlocs to level 2 once your opponent builds a tidal guardian. The first wave will probably kill all your murlocs, but they can rebuild quickly. The beauty of the farm is that if you build the farm at the corners, as I suggested, the tidal wave will never go straight down a lane, killing all the units in the lane.

14. Skull pile
A skeleton spawning in your farm is not a bid deal, even if it is a general. You probably have unit production buildings around the farm whose units can kill these rouge skeletons. Later on, you can trap some big units in order to combat threats like this. Also, never underestimate the dps of 12 murlocs hitting one target.

15. Death pit
Spam perfectly counters death pits, rendering them pretty useless.

16. City of Decay
2 Coral statues prevents the effects of the city of decay on your farm.

17. Chilling mushroom
These things prefer air to ground, but if one hits a farmed unit, the world is not over.

18. Frost launcher
Will only freeze production and freeze murlocs in place. Not a big deal.

19. World freezer
Farming doesn’t counter world freezer, but world freezer doesn’t counter farming either.

20. Serpent ward
Again, aoe is not a big deal.

21. Stun ward
Farming is neither good or bad versus a stun ward.

22. Artillery
You already have coral statues to counteract the artillery.

23. Assassins
Although technically not a special building, farming somewhat counters assassins. Sometimes, because of the shear number of units trapped, enemy assassins target one of the murlocs. However, most of the time, the assassins are blocked off from reaching the murlocs and run around aimlessly until they die from a random cause.

7. Farming units other than murlocs
In addition to naga, other races can trap units. There are 4 types of units commonly trapped: spam units, magic resist units, damage units, and heal units.

Spam units: These units include grunts, footmen, trees, satyrs, frost wolves, zombies.
These spam units may be trapped in the absence of a naga or when you are playing a public game. Keep in mind that without a naga, you simple way to heal your trapped units, and they will give some bounty. A special note with grunts is that their collision size is huge; only 4 may fit in a box.

Magic resist units: These units include defenders, banshee, and spellbreaker kodo.
One may care to trap these units for their magic resist properties. This counters damaging specials, but not single kill specials like magic tower ruin, death pit, or oracle. Another problem is that these don't spawn nearly as fast as spam units and cost a lot more. A benefit is that defenders and banshee are very good units in battle. You can rally them in or outside a farm with some practice. Rally them in when you're either a. winning a push so hard you don't need the extra units or b. losing a push so hard, extra units won't help. An extra note about the spellbreaker kodo is that their collision size is one of the biggest in the game and is extremely difficult to farm. Also, farming with an orc on your team is generally a bad idea, because the only saving grace of the orc race is their totems. With many units in traps, totems become a lot less useful.

Damage units: Units with good aoe damage may be trapped
Units with high splash damage such as Royal guards, incubus, chaos champion, infernal maybe be trapped in the extremely late game when mass synced tentacles become an issue. 4 synced tentacles all hitting the same building for the complete duration of the tentacles can kill that building, even with coral statues healing. This is a problem for farms, because all the tentacles will probably target around the same area and your opponent can use the tentacles to focus one building(yes, you can control what tentacles attack). Splash units kill these tentacles almost instantly.
In addition, I've seen amazons being trapped close to the front lines. In addition to being almost magic immune, these amazons can use used as somewhat of a tower. However, in my opinion, amazons should be used whenever you can in a push, as they are such a great unit. Smart rallying can, as with magic resist units, be used to determine which amazons are trapped and which ones go into battle.

Heal units: Currently the only healing unit in the game you can trap are wizards.
Wizards can be trapped for their heal properties. You can either use them to heal in the absence of coral statues or in conjunction corals statues. Again, you can rally them either in or outside your farm depending on when you need them in your push. They also do good damage, especially with a good chain lighting.

8. Ramifications
The introduction of farming brings about a huge changes in the metagame. The first change I would like to directly address is that this strategy is EXTREMELY effective versus special buildings, so effective that a small farm of 120 gold will counter many specials. Once your farm builds up, the following special are made almost completely useless and not at all cost effective to the other team: Obelisk of light, city of magic, well of pain, magic tower ruin, volcano, oracle, ancient pyramid, death pit, serpant ward. To a lesser but still great extent, tidal waves and starfall obelisks are made weaker. Yes, 120 gold can counter all these buildings.
The downside to farming is that your own special buildings with become less effective: These buildings include obelisk of the wild, silver glade, and totem. If farming become prevalent, we should see a huge decrease in the use of special buildings, both killer and buff varieties. As a result, castle fight will become more unit dominated, the way it was intended.

The balance of races is extremely disturbed by the advent of this new strategy. No longer does the combination of elf, chaos, corrupted, and night elf dominate every single other strategy. Elf, corrupted, and chaos have gotten worse, because their best buildings, obelisk of light and well of pain, will be drastically reduced in power. While elf still has the extremely good units to stay a top race, corrupted unfortunately does not and is relegated to the bottom of the race balance ladder. Chaos also got the short end of the stick, as their best building, the magic tower ruin cannot be spammed anymore. Naga is now obviously a lot better because it is the best farming race. Although undead's pits are less useful now, undead never really relied on their pits to be useful. The combination of skeletons and banshee still allow undead to be a useful race. Night elf loses their 2 specials, but I argue that they are still a good race. The 2 night elf specials it lost were both meant to counter of specials to some extent, and now that the use of specials has decreased, OotW and silver glade are not in as high demand anyways. In addition, night elf still has the extremely good units that can dominate at all stages of the game. Farrie dragons are extremely good in the early game, assassins run rampant throughout the whole game, and Amazons are a game changer, defeating whole pushes with ease. Ice/northern didn't directly become anymore powerful, but now that other races are worse and killing buildings don't kill everything in sight, ice got an direct buff. Maybe now we will be able to see frost queens owning up lanes. Orc is really hurt by this new technique. Even though it wasn't spectacular before, Orc's best building, the totem, is completely incompatible with farming. In addition, orc units are on average, terrible. Human has the most interesting change because of farming. Human now possess the only unit-affecting special that isnt' affected by farm: the horn. Now that units can actually survive combat, the horn, adding 60% to attack speed is huge. Although defenders and knights are human's only good buildings currently, spamming them is still a decent option and your teammates can make up for the lack of diversity.

Without further ado, I present an approximate new race tier list
High Tier
Elf
Naga
Mid Tier
Human
Undead
Night Elf
Low Tier
Ice
Chaos
Bottom Tier
Orc
Corrupted

9. Conclusion
Farming is such a useful technique that everyone attempting to get decent at this game should learn it. It is revolutionary and metagame-changing. Most specials are near useless now, almost as if they were taken out of the game. In the next version, there should be some type of fix to balance specials: make them less powerful without farming, but more powerful with farming. The only change I can think of is a change to how specials target, similar to how the chilling mushroom prefers to target air.

I worry that once again, the game will be centralized on one concept, as it had before with mass specials. More specifically, people will start to build unit producing buildings that are hard to counter, such as dragonhawks or wizards. Clearly, some races are better than other and will probably see more use in pro-private games. But castle fight is once again turned into a new and better game, even without a new update. I see more games won on timing, syncing, and strikes, rather than who can mass the most specials.

So, in conclusion: farming is extremely powerful; it counters specials very well; massing units can work now

Tuesday, June 09, 2009

Castle Fight Strategies: terminology guide

Imo it is important to talk the same language while playing in a team. This language should be as short as possible, because you need a lot of time for other things in castle fight. If you play with a lot of ppl who are new to the map you dont always want to explain things, so I thought about a terminology guide. Ppl playing with more serious players for the first time often have problems with little commands which are often used and I want to make it easier for those ppl. They can play, hear a command, look it up hear and do it. Ofc I listed the commands I use and it is possible that I forgot some, too. Pls pm me if you think I forgot a command, write the command and the meaning.


RACES AND BUILDINGS

eu (elven union)

bm (blade master, 220 gold)
thirster (blood thirster, 275 gold)
hawk (dragon hawk, 310 gold)
wiz (wizard, 475 gold)

ool (obelisk of light, 235 gold)
hex (city of magic, 240 gold)

ne (night elf)

ama (amazone, archer 150 gold -> master archer 200 gold -> amazone 400 gold)
asa (asassin, 200 gold)

oow (obelisk of wilderness, 220 gold)
glade (silver glade, 235 gold)

naga

murcs (murloc hut, 120 gold)
suump (suumpmolk, 175 gold)

ap (ancient pyramide, 360 gold)

hu (human)

pala (paladin, crusader 280 gold -> paladin 245 gold)

horn (gjallar horn, 225 gold)

ud (undead)

pile (skull pile, 160 gold)
lich (lich king, necromancer -> mighty necromancer -> lich)

dp (death pit, 360 gold)
cod (city of decay, 750 gold)

chaos

succi (succubus, 230 gold)
fiend (blood fiend, 280 gold)

mtr (magic tower ruin 200 gold)
sod (shrine of desruction 850 gold)

corrupted

nether (nether drake, 235 gold)

wop (well of pain 275 gold)

northern

hrim (hrimthrusa, 160 gold)
azure (azure drake 280 gold)
magna (magnataur, wolf 115 gold -> bear 125 gold -> magnataur 280 gold)

fl (frost launcher, 210 gold)
shroom (mushroom, 130 gold)

orc

wyv (wyvern, 220 gold)
shami (shaman, 170 gold)
trapper (troll hut 200 gold + upgrade 80 gold)

rock (serpent rock 350 gold)
statis (statis totem 475 gold)

If you want one to build siege you just say "X" build siege. The same works for legendaries.


TACTICAL COMMANDS

coin "X" - this means that you take the builder of player "X" and look with his/her builder for coins.

"X" field farm up/down - this means you should build a farm on the upper or lower lane. "X" fields means that you have leave a certain place from the edge of the map. Every building has a radius of 2 fields, so 4 field farm means that you have to leave 2 buildings space, 2 fields means you have to leave 1 buildings space etc.

sync - one of the most important commands. The best thing is when your units come out at same time with the tank in front. Therefore sync means that your unit have to spawn right after the tank. Ofc it depends, air units are much faster than ground units so they have to spawn later.

"X" micro "X" - this means that player "X" has to use special building "X". It is mostly used in combination with the horn. One player takes care of the horn so it buffs the units when they are near to it.

dont cluster - this command means that one opponent took northern and you have to leave 4 fields among the buildings, because the great fl has a radius of 4 fields.

share - this means that every player has to give control over his/her builder.

orb - this means that one player has to buy the orb and USE it (mostly on the wizards).

stop prod - this means that you have to stop the production of your buildings.


I'm sure I forgot some, so just pm me pls so I can add missing commands.

Monday, June 08, 2009

Castle Fight Strategies: guide to coin

As everybody knows there is always a discussion about coins and the one magical question is: "Do we play with or without coins?" I don't want to say why I love coins, I just want to help people who have problems, because of delay or other reasons.

1. When do coins spawn?

The first coin spawns at 44 seconds, the next at 1:24 min, the next at 2:04 ... You can see every 40s spawns a coin and is available for ca. 5-6 seconds. You can use either the table in the right upper corner to look for the game time (which is the best solution I think, because of other in formations) or you can wait for the "bounty incoming" message which stands under your income 4 seconds before the coin spawns.

2. How to collect the coin?

You should always use sound and a headset, because you can hear where the coin spawns. Ca. 1s before the coin spawns you should start scrolling your screen from lefter upper corner to right upper corner, while your mates are looking for other positions, this has a huge advantage: You hear the coin and spawning sound becomes more quiet if scroll away, so you can hear the coin much better. If you have a low delay because you play with list checker you should blink to the coin, then run a bit, because after every blink is a little pause if you have low ping and then blink again. If you have a higher ping you can blink twice in a row, but you have to test the periods and train it. Double blink is an advantage because you can get the coin fast although you play with high delay. You also can triple blink and 4 times blink, its just a question of training. I always use the big card and don't scroll with mini map, but you can try it if you want to. But in the end there are 3 different possibilities:

A
Everybody does his own stuff and runs for the coins when one spawns (bad idea if the coin is needed for a strategy).

B
You divide the field into 4 parts, every player has one part and stands in the middle of his "turf". If a coin spawns in his area he gets the coin (also bad for a strategy).

C
Everybody gives control of his builder to other players. The one momentarily needing the coin stands in the middle of the map before the coin is spawning. Every player without any tasks (like microing horn or repairing with the other builders) looks for the coin in another area. If he sees it he blinks to the coin with the builder needing the coin.

The dividing of the field is up to you.

3. Who gets the coin?

This is up to your strategy, but in the beginning the builder with the most expensive building should get the coin.


Later on (about 15 min) it is luck to get a coin, because the battle makes too much noise, but until 12 min it should be possible to get at least 95% of the coins.

Sunday, June 07, 2009

Castle Fight Strategies: guide to rally point

There are four directions to rally point, up, down, left, and right. Keep in mind that the castle fight map goes sideways, so towards your opponents is either left or right. Now, pick one of those that you want the unit to go. For each direction, there are two different ways to place the rally point. Consider rallying right. You can rally from the top right corner directly to the right, or from the bottom right corner also directly to the right. All rally points should be in a straight line from a corner of the building, not in the middle, but which corner is correct?

The answer is very simple: start in the middle of the side you are rallying to, between the two corners, and go *clockwise*. On the right side, clockwise will take us to the bottom right corner. Rally directly to the right of the bottom right corner.

For the top, rally straight up from the right side.

For left, rally straight left from the top corner.

For bottom, rally straight down from the left side.


Q: How far away should i put the rally point?

A: 80% of the length of a building works.

Q: What if I want to rally left, but the left side is blocked by units?

A: It won't work. Design your farms to avoid this problem. Know which area of the farm will fill up first, and therefore which buildings will no longer be possible to rally into the farm. Then put buildings there that you didn't want to rally into the farm anyway, like obelisk of light.

Q: What if another building is blocking *half* of the left side? Say the top half of the left is blocked.

A: The bottom corner of the left stays the same. The top corner of the left is blocked, so use the first open space towards the top, which is the middle and treat that as the top left corner for rallying left.

Q: How did you figure this out?

A: There's only two places to consider putting the rally point per side. Just try both and see which works. The original rule I worked out was: go in a circle *counter-clockwise* and when you first hit the open area you want to rally into, rally there. You could equally well go clockwise and rally to the last part of the open area where you want the units to go.

Saturday, June 06, 2009

What will be new in Footmen Frenzy 6.5

The only real holdup is the new heroes. Triggering some of this stuff is difficult =p. Here are the changes so far...

Falcon - RoF changed to Falcon Punch!

New loading screen.

Item carrying creep added.

DR's summons reworked. Number of units changed from 1/2/3/4/5/1 to 1/2/2/3/3/1. Stats changed on units. Level 4/5/6 gain attack and defense ups.

Jaood now has hero damage.

Owls - level 4/5/6 are now ethereal

Socks cd from 900 to 450

New Heroes - 4 of em (curser, holy guardian, tortured soul, sharon)

pocket factory bounty from 20 to 20/40/60/80/100/100

chim bounty to 50/100/150

roar ult bounty 50/80/100

Demo now level 6 creep

CM aura buffed

K-Rose invis changed from 30 seconds to 15.

shock cd to 10/9/8/8/7/6

lightstorm to 200/350/500

Reworked damage to heroes. Melee units will all do full damage to heroes... ranged units will be slightly less depending on range distance, etc.

Changed cd of some lategame items.

Friday, June 05, 2009

Castle Fight Strategies: guide to banshee

Banshees are one of the most controversial units in castle fight. Some think they're way too strong, while others think they're lots of counters for them. I'm going to shed some light and share my experience.

As a disclaimer before i say anything further: I'm talking about private -pr3 -lm games between good people. None of this applies in public games.

The First Banshee
The first banshee is the most important banshee you get and it might be the most important single building in the whole round. To build a banshee, it is imperative that you collect the first coin, which nets you an easy 11 gold. Bansheeing in -nc games isn't viable. It's important to note that the banshee is the single best unit you can build with one coin.

Early game
In fact, I'm going to say this now: In a 4v4 private game, there is NO good unit counter to an early banshee push. (ie. the first banshee you build).
Why is this?
In 4v4 private games, both teams build in one lane and sync their first units into combat based on build time, movement speed, and in what order you want units to arrive to battle. Usually you want your most durable unit(tank) to get to the fight first, because all 4 of your opponent's units will be focusing whatever unit engages them first. This allows for low hp but high damage units to survive and do their job (ie. archers, bloodthristers, druids). The possible tanks include: banshees, defenders, kodo windigo). Usually whichever tank falls first loses the push for its team. This is the scenario for a starting push in castle fight.

Ok, this next part gets a little difficult to understand. The problem here is that no tank can outlast a banshee under normal circumstances. Why? When most teams see an Undead worker picked on the other team, they intelligently assume banshees will be built. Then, they assign one person to make a chaos-damage unit so their push consists of 3 regular-damage-type units + one chaos damage unit. The other push will consist of probably 4 regular-damage-type units. Your team will be doing 25% damage with 3 units and 100% with one unit to the banshee tank. Your opponent will be doing 70% to 175% to your team's tank. Even though banshees probably have much less hp than your tank, your team’s tank will almost definitely fall first. In addition banshees are usually paired with farrie dragons will heals banshees for almost 4x effectiveness in comparison to a regular unit. The point: banshees seldom lose.

So what if your team gets 2 or 3 chaos damage units? Well, the first foreseeable problem is that you’re limiting the types of units you get and many chaos-damage units aren’t especially good early pushers. Also, if your opponent’s team can simply sync so another unit is in the front to tank or better yet, build another undead unit that’s not banshees.

The most popular choices for countering banshees early game and the reasons they don't work include:
Bloodfiend: Unless you get lucky, this unit isn't very durable.
Zombies: These things don’t' have very good stats and again aren't very durable.
Frost dragons: Very hard to sync, because they are so fast and fly. Also, they're not very durable especially vs banshees. On an unrelated note, banshees actually beat these 1v1.
Naga siren: You have to save for an insanely long time and you will have lost the first push by the time you get these plus you'll be behind a lot on income.
Druid: Theoretically this COULD work, but druids extremely flimsy as well and if your team has banshees, you’re probably better off with a fairy dragon.

In my opinion, the best counter to banshees is super early building. If your opponent is making banshees, they will probably wait and sync on the banshee. If you get 2 waves pushing together before their first wave can come out, you will probably win the push. However, your units won’t be the best possible early game units (all under 255 gold or 275 if your unit has an upgrade like defenders). If the other team is extremely quick, they can adapt and counter your strat with quicker buildings.

Mid Game
During the mid game, units with chaos do pretty well, because there are no (or less) complex tanking mechanics going on. Naga sirens especially work wonders versus banshee. Also, tentacles become a viable option, because one group of tents can kill a
banshee.

Late Game
Remember that to win the game, you’re not trying to counter banshees; banshees aren’t the only units your opponent is making.
You must counter the combo of units and specials your opponent’s team is making. When the late game comes around, another strength of banshees is shown: They are highly resistant to spells and can be healed with extreme efficiency by wizards and glades. Late game is all about large presences on the battle field. Many games see 30 units on each side battling it out with reinforcement rates almost equaling death rates. This is the reason why long range siege units are effective late game (They build up because they never get hit by conventional attacks and don’t die). Banshees are a key part of this equation, because aoe spells are not very effective against banshees. These include: frost nova, chain lighting, warlock explosion, tidal wave, starfall. Wizards heal all the damage from these aoe spells very well and in fact, in many games, late game pushes consist of almost entire banshees and wizards.
Ironically, banshees plus wizards counter chain lighting from wizards, frost nova from ice queens, and the explosion from warlocks. I would go so far as to say they counter these units even though the units all have chaos damage. (Actually banshees definitely are good vs warlocks because warlocks don’t even attack enough with their regular attack for it to really matter.)
Units with regular chaos also don’t work very well, because they hardly ever attack banshees (same principle with early game where all units focus one unit on the other team). In addition, generally late game is all about aoe spells and specials(which are spells). Units are too busy dying to aoe spells to actually be effective in battle. The only things that are effective versus(notice how I didn’t save counters to) late game banshee are units with chaos splash. These units include azure dragons, red dragons, incubus and infernal. All of these are effective against both regular units and banshees.

A fun analogy
A good analogy from Warcraft melee concerning with countering a strategy: Nothing the orc army has really counters mass druids of the talon.
Theoretically, raiders counter dotts, because they do extra damage to them and take less damage from them.
Theoretically, spirit walkers counter dotts, because they can dispel all of the dotts’ spells and also redistribute the damage from dott focus fire.
Theoretically, the tauren chieftain counters dotts, because it does aoe damage to lots of units
Theoretically, the blademaster counters dotts, because it rips up low hp units.
So many newbies get all 4 of these things and fight a dott army and lose horribly. Why?
They’re too worried about countering dotts and not the whole overall strategy. The elf can position his army so none of your units can hit dotts. It is extremely hard to maneuver around 3 heroes, 2 quillbeasts, and a pocket factory that your opponent gets. Position is often more important than army size or composition. Therefore, raiders will have a hard time actually attacking dotts. In addition, although dotts do reduced damage all the units and heroes I named, the elf heroes will also be throwing out extremely high dps. Although spirit walkers can dispel, they’ll never have enough mana to dispel every single cyclone, because you can never have more walkers than they have dotts. The TC is negated by mana burn and scrolls of healing. The blade is kept constantly in the air. Although you can dispel the cyclone, it is very hard to react immediately, so the blade will always be in the air for a few seconds.
You’ll be surprised to find out that orcs actually do get this combo of units versus mass dotts. The key is timing. You can harass the night elf and attack him during very small windows where the elf is vulnerable. Also, you must avoid fights, many times trading tps. While doing this, you must slowly level up the tauren chieftain so that his shockwave will overwhelm the number of scrolls of healing the elf has. During a fight you must ensnare the dh out of range of the TC and keep the dh away from the TC as much as possible. In addition, you must alternate between focus firing heroes and dotts, because if you mass focus heroes, your opponent will just try to soak the damage will doing constant dps to your army, but if you mass focus units, the elf heroes won’t die and level up extremely fast, overwhelming you. None of this is very intuitive, but this is how it works.

Miscellaneous
On a completely different note, banshees counter the early orb of lighting + scroll of stone combo strategy after a strike, which often forces a team to use 2 strikes one immediately after the other, because they don’t die to orb of lighting.

Conclusion
My point? Banshees are strong at all points of the game.

Thursday, June 04, 2009

Castle Fight Strategies: guide to human

Ok, before i start with the actual guide...i want to make somethings clear. CF is a Team game - especially with human. You cant play alone - u got no good chaos damage for banshee rush, no good anti special stuff, no good unit killing specials. What you do have, is good tanks, anti air units, cheap spammable artillery (both units and specials) good supports and most of all...Unit Spam. So yeah, play as a team.

Another thing - this isnt a Strict guide - u cant join a game and alt tab here to see what to build in what order and what to buy etc. You need to adopt your own strategy. This here is just as a guide to help you around how to counter, make combinations with ur mates, and all around following the game.


with that said, the guide starts now :
First thing to mention is the pros and cons of the race.
Pros :
-Good massing units
-Specialized units
-Good supporting abilities
-Really powerful artillery (when used right)

Cons :
-Many tactics can counter them
-Massing units may often cause to lose so careful what units u mass
-Their specialized units can easily be countered, so you need to micro well and sync ur units
-Lousy tower

All in all, u see that human is an easily counterable race. So, until late game comes in and u have 12 warlocks, 24 gryphons, shrine and other units, u are easy to be countered, so if u are, get your friends to help you.

Now, the units :
1.Footman - 100g
250 hp
18 DPS (normal dmg type)
4 armor (heavy)

--------------------------------------------------------------------------------------------------------------------------

It can be easily seen that the unit itself is pretty weak. However, its DPS/Gold ratio is pretty high. This means that if massed, it can pose some threat (but careful - if u are facing avatars of vengeance, dont even THINK about massing these, and that is just an example)


2. Defender - 275g
575 hp
38 DPS (normal)
7 armor (heavy)
has evasion and defend (reflect ranged attacks)

--------------------------------------------------------------------------------------------------------------------------

One of the best tanks around (considering the price) . Most of the time, footman is built just so you can upgrade to defender. And he is pretty worth it.


3. Sniper - 140g
270 hp
22 dps (pierce, 500 range)
0 armor (medium)
Has critical strike

--------------------------------------------------------------------------------------------------------------------------

Another good massing unit. This unit is best massed vs light armored units. However, with the recent 1.13b version, its main purpose is to either sit around like that to see if u can counter both land and air units, or specialize it into anti-ground or anti-air unit


4. Marksman - 300g
450 hp
61 dps (pierce 500 range) to air
28 dps (pierce 500 range) to buildings
1 armor (medium)
Has critical strike vs air (its pretty devastating :) )

--------------------------------------------------------------------------------------------------------------------------

Personnally, i hate this unit but...oh well :P . It is a pretty good anti air unit, and i've often seen it one hit some air units with critical. I'd not recommend it for massing unless opponents go all air


5. Heavy Gunner - 320 g
53 dps (pierce 550 range)
525 hp
5 armor (medium)
Has splash

--------------------------------------------------------------------------------------------------------------------------

A really good anti-ground unit. When backed up with some tanks, it can be a really good unit. When massed, its even better - it can easily kill an entire wave if u have a strong tanking line.


6. Mortar - 210 g
280 hp
21 dps (siege 1000 range)
0 armor (light)

--------------------------------------------------------------------------------------------------------------------------

One of my favorite artillery units. No, not because of the lousy dps and hp. But because of the easy spammable price - in most games i often find myself having like 10 mortar buildings and not into late game. So when we push, the buildings fall really easy. Needs a strong tanking line tho. And no assasins.


7. Gryphon - 250 g
500 hp
23 dps (magic 450 range)
2 armor (medium)
Has Bash and chain lighting on attack

--------------------------------------------------------------------------------------------------------------------------

Another great unit to mass. Actually, unless your opponents start with ground non-air-attacking units, this unit is only capable of doing something if massed. 6 gryphons often cast chain lighting like crazy and have an easy push. If u have gjallarhorn, its even better.


8. Crusader - 280 g
600 hp
42 dps (hero)
6 armor (heavy)
Has devotion aura, cleaving strikes and inner fire

--------------------------------------------------------------------------------------------------------------------------

Another may-be tank. Tho he is much better as a supporter, especially with inner fire which is more or less a heal.


9. Paladin - 525 g
850 hp
67 dps (heal)
9 armor (heavy)
Has devotion aura, cleaving attacks, bash, inner fire and ressurection

--------------------------------------------------------------------------------------------------------------------------

Even better than crusader (ofc :P ) . His ressurection makes him an awesome supporter and spamming unit - have a group of 8 paladins and they never die :P especially with an ice queen around.Paladin may also act as a tank because of his high armor, however even tho his buff buffs good, he likes to cast it to other units, so in some situations, paladin is better than defender in tanking


10. Warlock - 300g
350 hp
17 dps (chaos 160 range)
1 armor (Unarmored)

--------------------------------------------------------------------------------------------------------------------------

Probably the best unit to spam in whole castle fight. 10 warlocks usually give the same results as a rescue strike, which by late game is easily achievable.


Those are all the units. Now, about the specials. The lumber costs remain a mystery but i will figure it out soon :D

Artillery - 200 g
Shoots at random places in the opponent's base, dealing 400-500 siege dmg.

--------------------------------------------------------------------------------------------------------------------------

This is probably the best late game special ever. Having multiple of these (and by that i mean 10-15) will easily win the game for you. THIS is the reason why human are becoming really lousy when playing -na. Artillery is their best thing.


Gjallarhorn - 225 g
Increases nearby units' attack speed by 66%. Casts it every 6 seconds. Buff lasts for 1 minute.

--------------------------------------------------------------------------------------------------------------------------

Although it is pretty good set on autocast, the best thing to do is cast it manually - turn off autocast and when ur units come around cast it. Thx to gjallarhorn, i often see gryphons killing red dragons in 1v1 situations.


Heroic Shrine (still not sure i got the name right :P ) 725 g
Gives a 22% chance to spawn 2 units instead of one. Doesnt work on legendary units.

--------------------------------------------------------------------------------------------------------------------------

There it is, the shrine of all massing. If u ask me, it is a must-have for all human builders. Shrine first, artillery second, safety third. Awesome for turning 10 warlocks into 15 or even 20 :P


Now, we're done with almost all buildings (im not gonna mention towers and treasure boxes yet, but with the recent balance changes, im gonna look up to them). What we have left is strategies. But as i said before, DO NOT STRICTLY FOLLOW THEM. Most of the time, u need to adapt to your opponents. For example, if the elf makes OoL and stops production, u need to do so too. Or else u will get ownd.

1. Defend da DPS

Human have 2 effective tanks - Defenders with their relative low price and good anti-piercing abilities, and Paladins with good armor and healing abilities. Use them ! Try to make a synced wave of tanks, gunners and snipers/marksman.
Something similar to the "imagined strategy of orc" (which is - mass grunts/axemasters which cut off esnared range units while being buffed), this strategy, if managed ok, might be the human strategy. In most games i know, human are about protection and holy stuff. Here, their protection is made by defender, and the holy stuff is in paladin. They can easily be countered by air, which is countered by ur ranged units. Which means, that human units help each other. Syncing them can make this strategy a winner. However, take care. You must rely on your mates to help you out with specials and divine units. Also, this strategy isn't recommended vs splash and other strategies which will damage your ranged units without killing the tanks.


2. AllYourBaseIsDestroyedByArtillery

Simply, counter your opponents, support your friends until u have enough money and lumber to make lots of artillery. A reminder - artillery is more or less useless if u have low numbers and opponents don't have lots of buildings. What artillery is good at is killing buildings which gives u money which gives you ability to make more artillery.
That is pretty simple, nothing else to say :P.


3.I beleive i can fly!

The only unit of human that can fly - gryphons. Not only do they fly, they can bash and chain lighting ur opponents, and they use no fossil fuel! Give them a ghallarhorn, and a shrine (just a shrine :P ) and they will hammer their way to the opponent's castle. Take care tho - if opponents use anti air units, it will pay off to make ground units too.
Again, not much to say except that if ur enemies make roflcopters, marksmen, dhawks or other anti air units, abandon strategy! You cannot rely on friends to take out some units. Exceptions are marksmen and possibly copters, which wont fight back vs most units, and your mates can counter them while u are massing your army.


4. Unlimited rescue strikes.

Yes human can do that :P . What did i say before about warlocks? Have a good mass or them and their nukes will kill the opponents to death. AND , they became smarter, so that once they unleash their nukes, they go back so not everything is lost.
One thing to say - if opponents make assassins, abandon strategy! At least until it is late game and assassins don't do much.

Conclusion : Now you know what human units do and what they can do to opponents. Yes, i know i posted strategies, but u need to adopt them to your game - the warlock strategy should NOT be used if opponents have assassin. Sure it might sound attractive - "hey look at me no0bs , i have rescue strike! Oh noes cheater killed my warlocks! " But yeah, the strategies were a bit emphasized :P . They arent godlike strategies and u need to collaborate.


Countering
A very important thing, not only for human, but also in all castle fight. In the beginning (pros&cons) u (probably) saw that humans are pretty specialized. The good side of that is that u have some way of countering almost every unit around (except banshee and specials). But the bad side is that if u don't sync ur units, the marksmen will go hunting air without a tank so melee units will kill it, then the air will attack the helpless paladin/defender leaving the warlock with no protection. So to avoid this, you need to sync your units.
About countering, there are 3 most important unit types :
Melee ground
Ranged ground
Ranged air (no melee yet)
now, humans pretty much have all they need to counter most of the units here. For melee ground they have gryphons. Ranged in a lot cases is pierce or magic, both reflected by defender. And air is obvious - marksmen.
however, there is a big problem about humans - assassins. They love to target and kill your gunners, mortars and warlocks. The most common solution is paladin, he has mana which means he will attract some of the assassins, and he can revive units.
Special Cases
In most cases, human are equipped with the right unit to counter opponents. But there are cases when things are deceiving. For example Dhawks. Often newbs dont know their capabilities and they "counter" them with gryphon's magic damage. But that is a newb mistake so we put it aside :P . Decent players have an instinct that makes them counter any air with marksmen. In most cases it is a good idea, but not in this case. Dhawks have heavy armor, which means low dmg from marksmen. So, even if a lucky marksman may kill a Dhawk, it is not good for u cause opponents can use ground units to kill them.
So, what is a good solution?
Well, ive often see this done by newbs who dont know what air and what ground units are :P . But they effectively countered Dhawks with...Defenders! Yes, defenders. But why? Well, simply - they wont attack them, but they will reflect almost all their attacks, and evade the rest, taking almost no damage. Eventually, the defender is going to kill them.

Other special cases are : Plague bearers (often people counter them with air, and are really surprised to see their units die to plague cloud), Wyverns (counter them with marksman, and u will barely attack. U can only hope to crit on the first attack.) and others
oh, and one more thing. Often you may be tempted into countering ground melee piercing units (such as wandigoo, naga guard, corrupted hound and others) with defender. Well, it isnt a bad choice, but remember - u will not take any damage if u build air units. Be carefull tho, if opponents can build anti-air units, then defender is the way to go :)

Supporting
I dont remember how many times i said it before but i need to say it again...CF is a TEAM game. And human's specialization enables easy supporting and combining with allies. For instance, ur friend makes a void keeper and opponent's naga counters with naga guard. Your best thing to do is a defender - it will protect the opponent and the void walker will attack air units in case opponents build them.
Then again, the situation is often in reverse - u build the mortars when opponents have a tower, and ur mates will protect your siege. Or u make gryphons and opponents make trolls. If u are going for the gryph strategy, allies will have to help u out until ur army of gryphons can take out copters or even Dhawks.

Out of the 6 different types (not including upgrades) units human can build, 3 are units which ur mates benefit from. Those are Paladin for the heal and ress, Defender for good tanking capabilities and Mortars for taking down towers. And of the 3 specials they have, 2 of them are supportive! Use them!
Another important thing - i know that through the guide, i made mortars look really good units. Not that they aren't, but do not overrate them. Siege dmg is probably the easiest dmg type to counter. AND, mortars don't attack air! So yeah, use them when needed but take care of how you use them!

Credits :
Kiraice for numerous tactics that helped me get better
Gex for the awesome game
ZliElektronicar and monk for their units stats file which helped me out with units stats
oh almost forgot, FlorWarrior for making the file compatible with excell 2003 :P

Update 1 :
-added countering strats
-added supporting
-added credits
Update 2 :
-added colors! (eye cookies ftw!)
-further explained some strategies, and fixed typos :P
-started hoping for the rep icon :mrgreen:
Update 3 :
-added special cases at the countering place
-started preparing for videos/replays

Tuesday, June 02, 2009

MONKEY ISLAND® IS BACK THIS SUMMER!

The long awaited game Monkey Island has been announced to be released this summer, exactly on 7th of July. Ahoy there !
SAN FRANCISCO, Calif – June 1, 2009 – LucasArts today announced that the original hilarious pirate adventure is back, with two new projects underway based on the classic Monkey Island franchise. First, Telltale will premiere the Tales of Monkey Island™ game series, delivering a completely new epic storyline and swashbuckling flair that will unfold across five monthly episodes on PC and WiiWare™ beginning with the season premiere episode on July 7. The Monkey Island celebration continues later in the summer when LucasArts publishes The Secret of Monkey Island™: Special Edition, a completely re-imagined version of the first game in the series that adds updated high definition graphics, a re-mastered musical score, and full voiceover to the classic adventure game originally launched in 1990. The Secret of Monkey Island: Special Edition will be made available on Xbox LIVE® Arcade for the Xbox 360® video game and entertainment system from Microsoft, and PC.

Read more at Telltale site